The Axelar Bridge connects multiple blockchain networks, enabling secure asset transfers across the XRPL ecosystem and beyond. This guide explains how the bridge works and highlights the key differences between Mainnet, and Testnet setups.
- Cross-Chain Transfers: Seamlessly move assets (e.g., XRP, IOUs, ERC20 tokens) between XRPL, XRPL EVM, and other connected chains.
- Interoperability: Unlock new possibilities for dApps, services, and users by allowing access to assets and functionalities across different blockchains.
Download and install MetaMask for your browser.
Choose one of the following XRPL wallets:
XRPL Snap
- Install the XRPL Snap for seamless integration with MetaMask.
- Follow the Quick Start Guide for setup instructions.
Crossmark
- Use the Crossmark wallet for a browser-first, non-custodial XRPL experience.
Connect Your Source Chain Wallet
- Click Connect.
- Select your XRPL wallet (either the XRPL Snap or Crossmark).
- Approve the connection request to allow SquidRouter to interact with your XRPL wallet.
- Once connected, you’ll see your XRPL address (e.g.,
rfLm...bYVY).
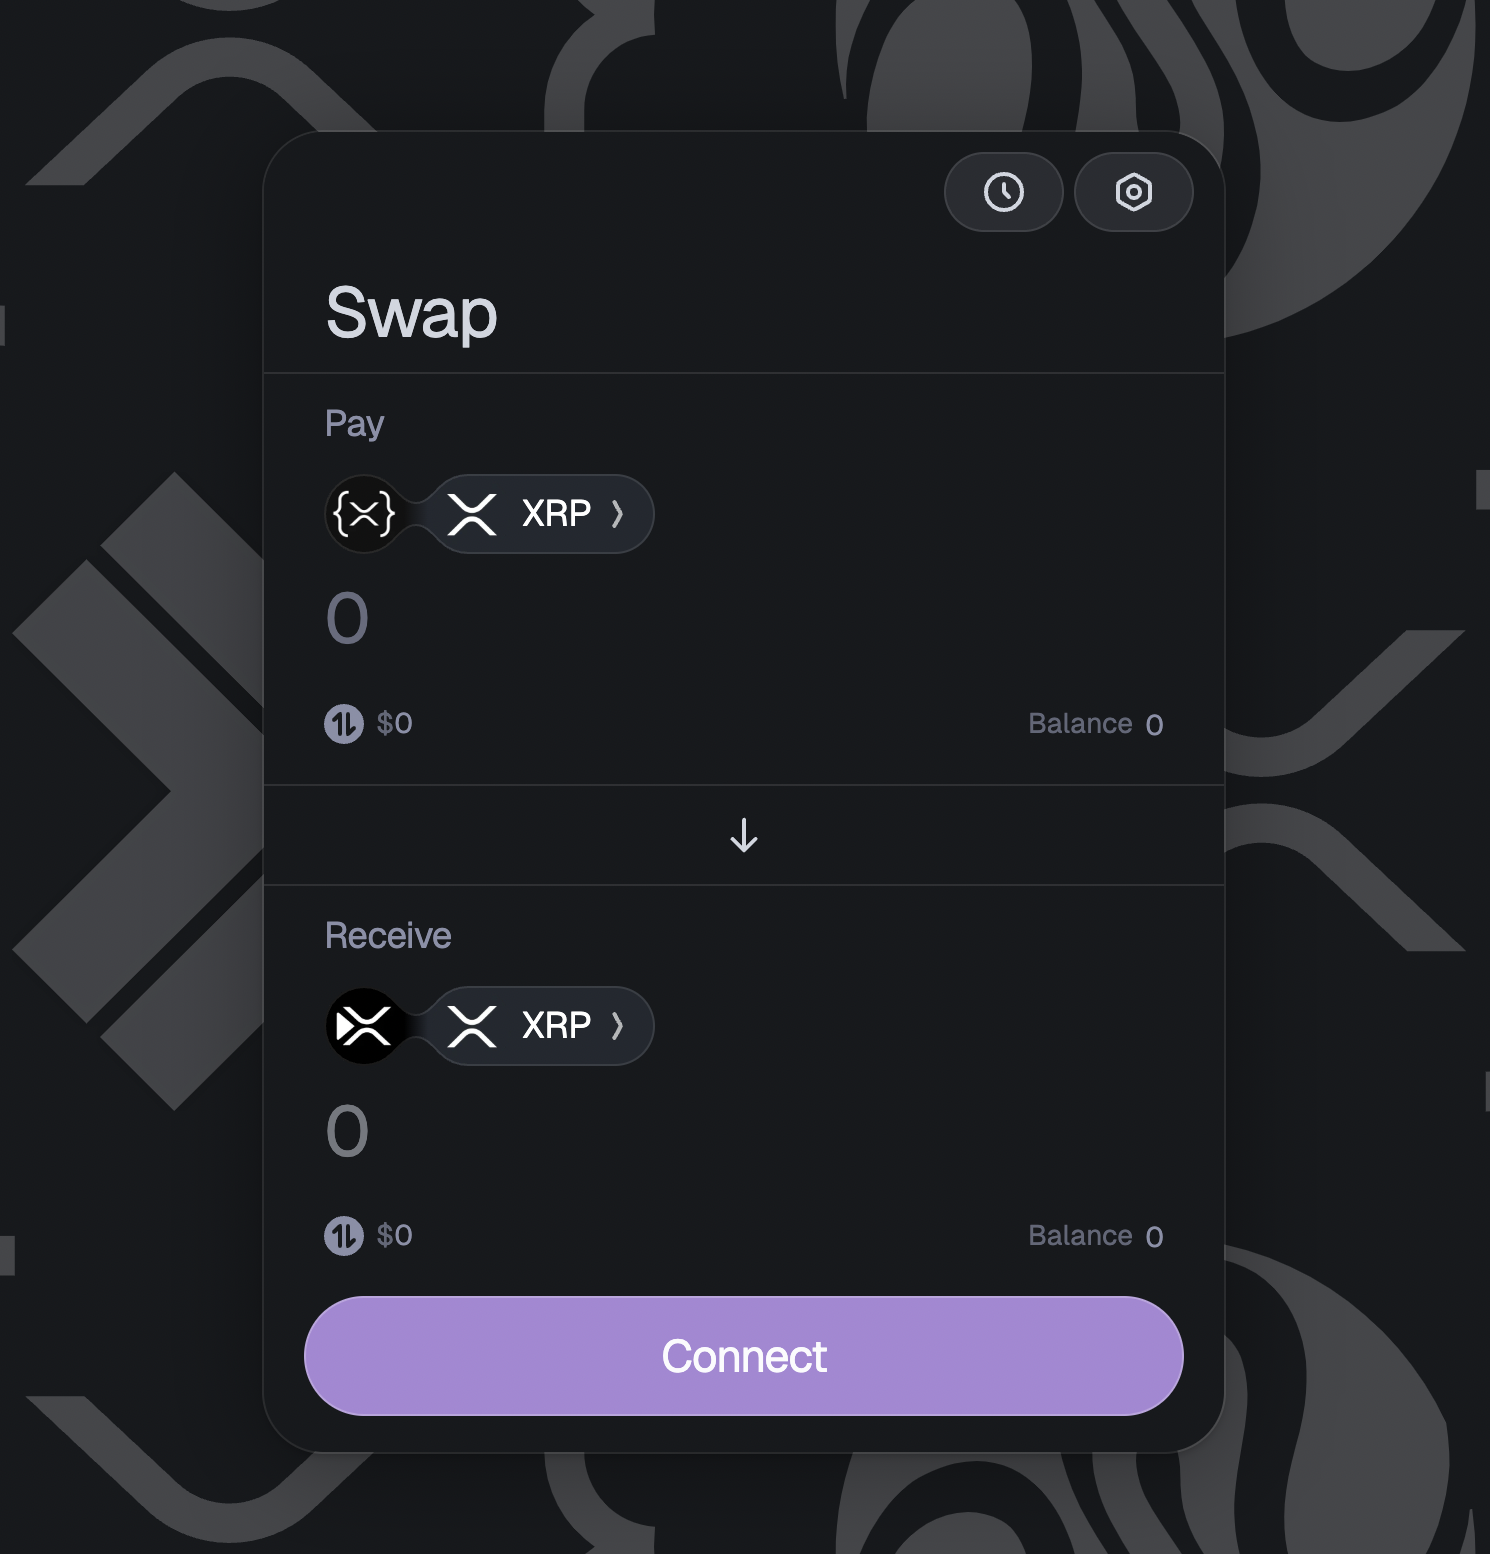
Select the Amount to Swap
- Enter the amount of XRP you want to bridge.
- Ensure you have sufficient XRP to cover transaction fees.
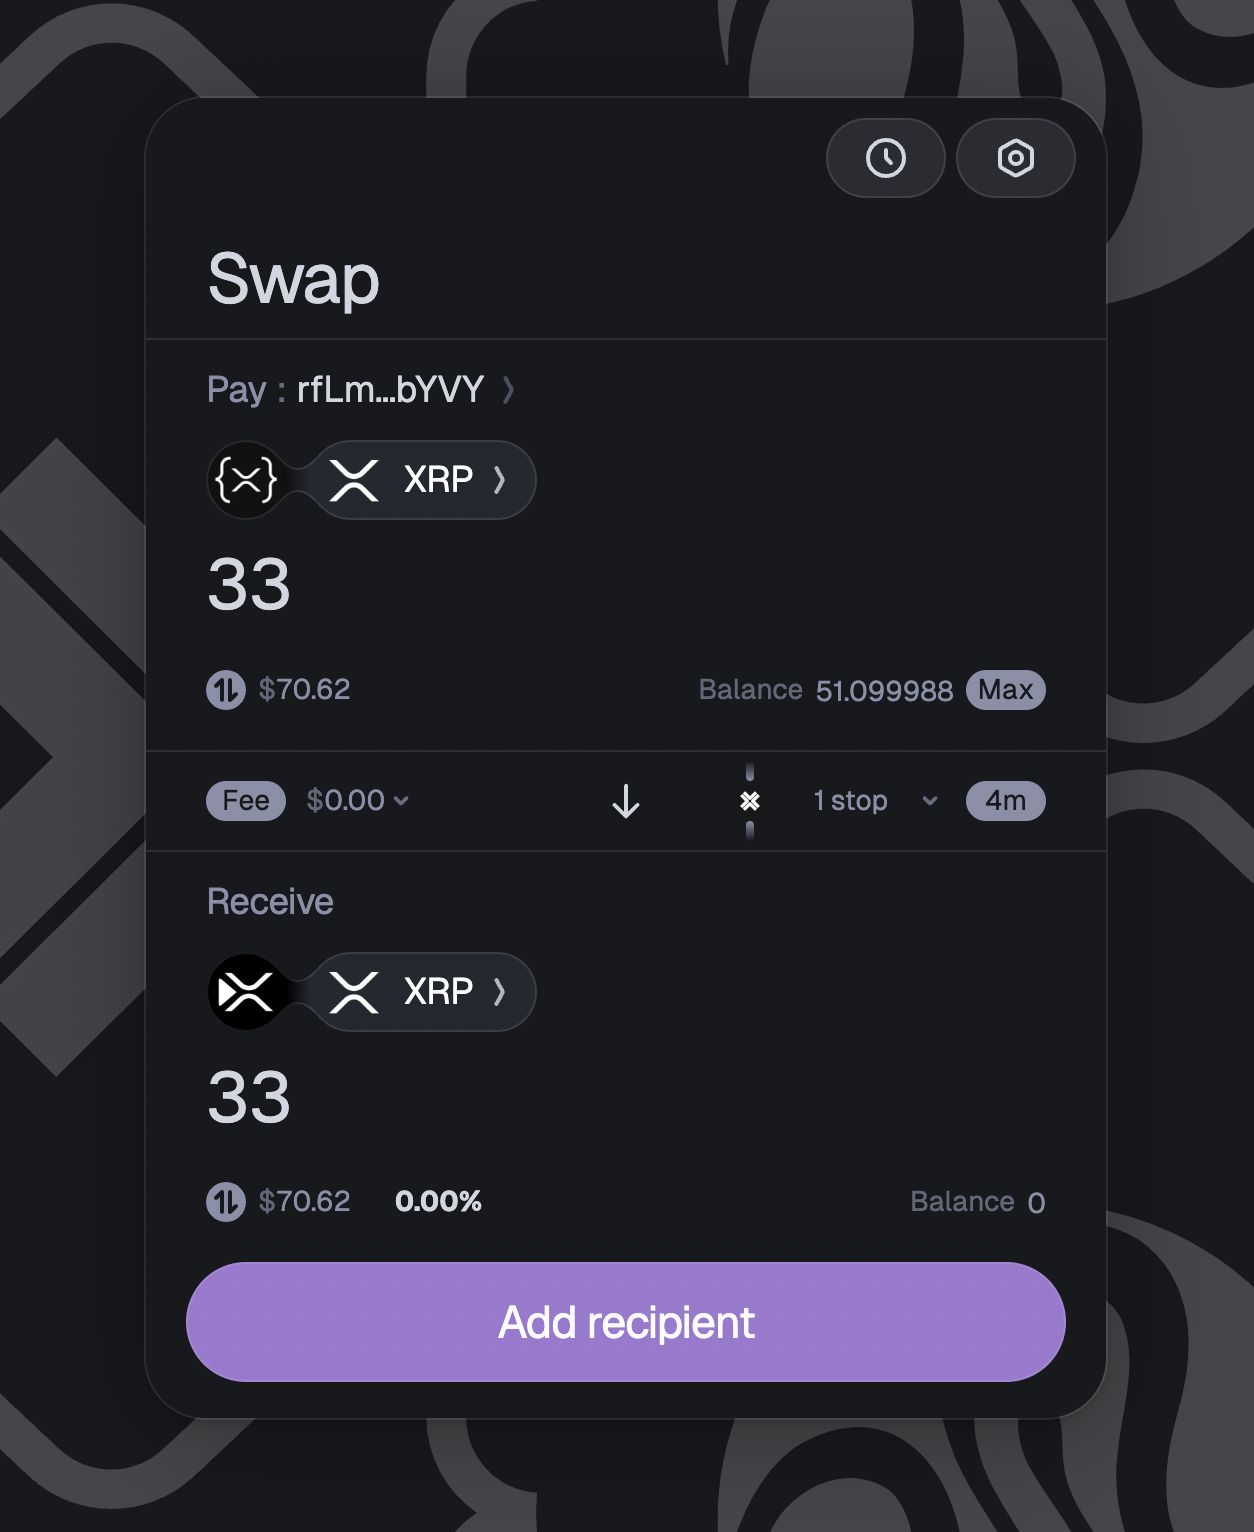
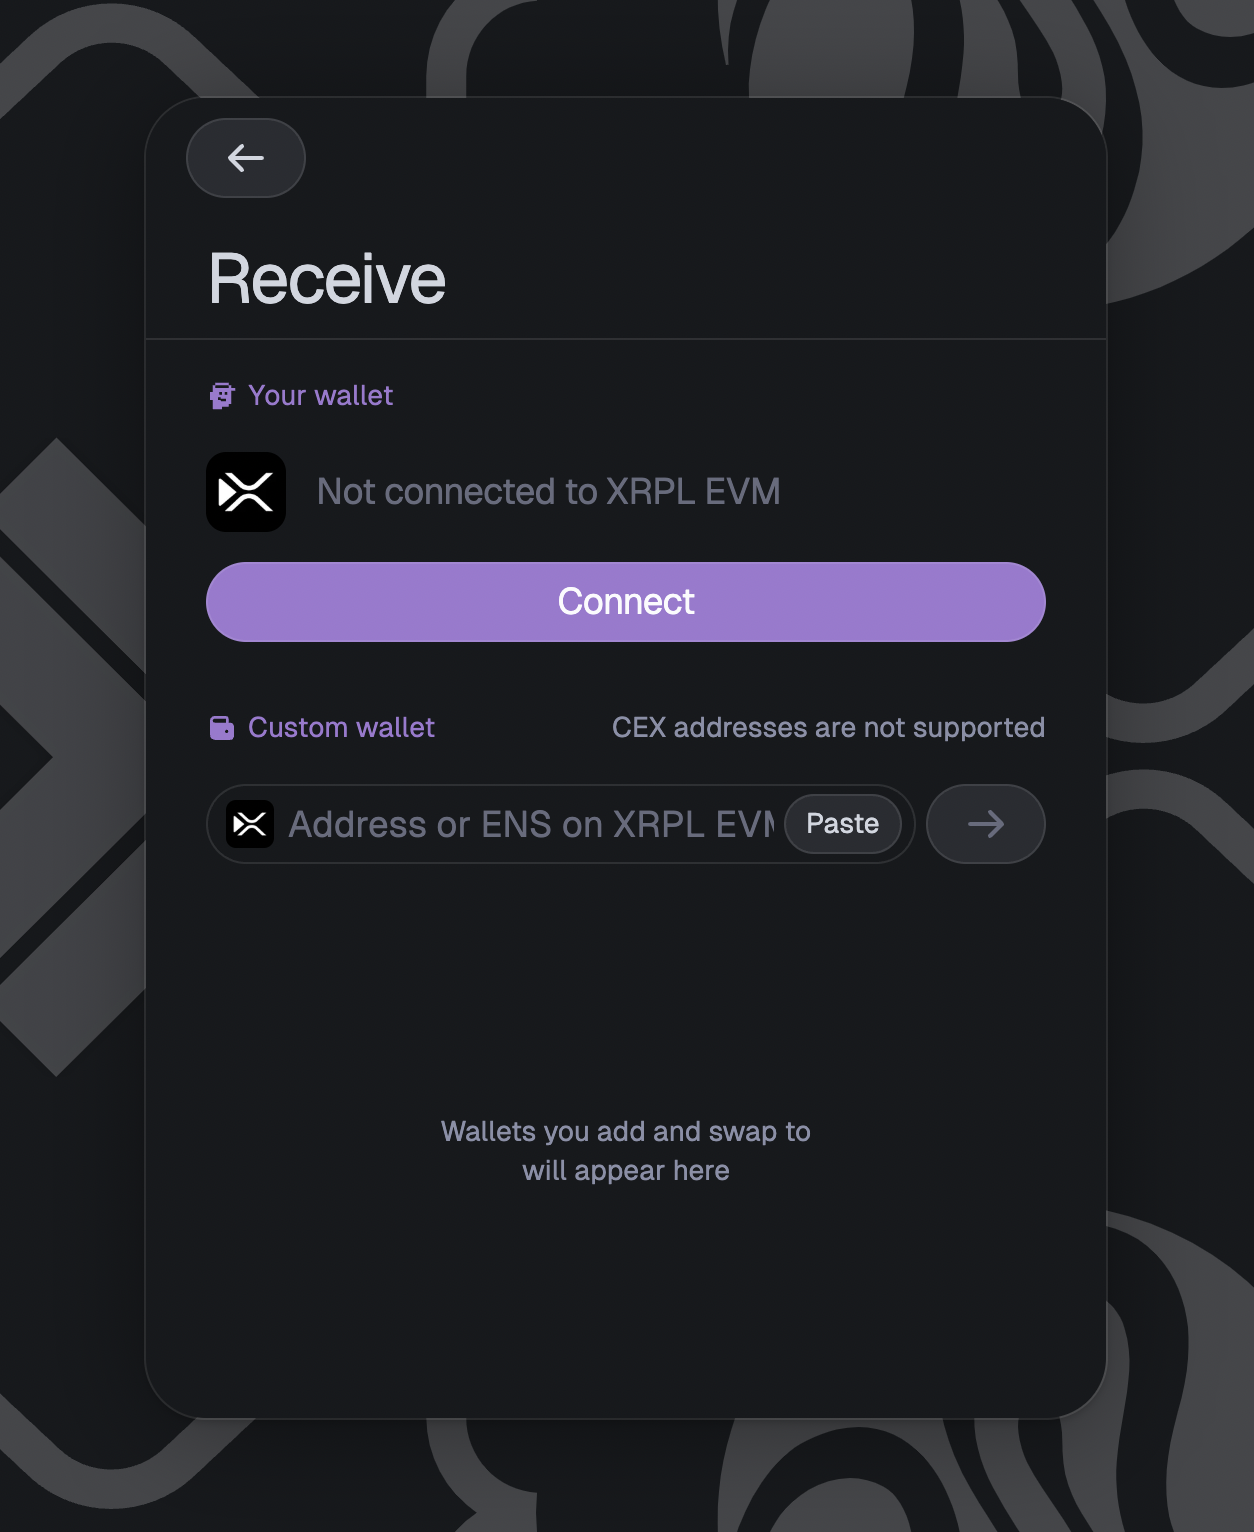
Set the Receiver
- Click Add recipient to specify your XRPL EVM address.
- Connect your XRPL EVM account using any WalletConnect-compatible wallet or paste the XRPL EVM receiver address directly.
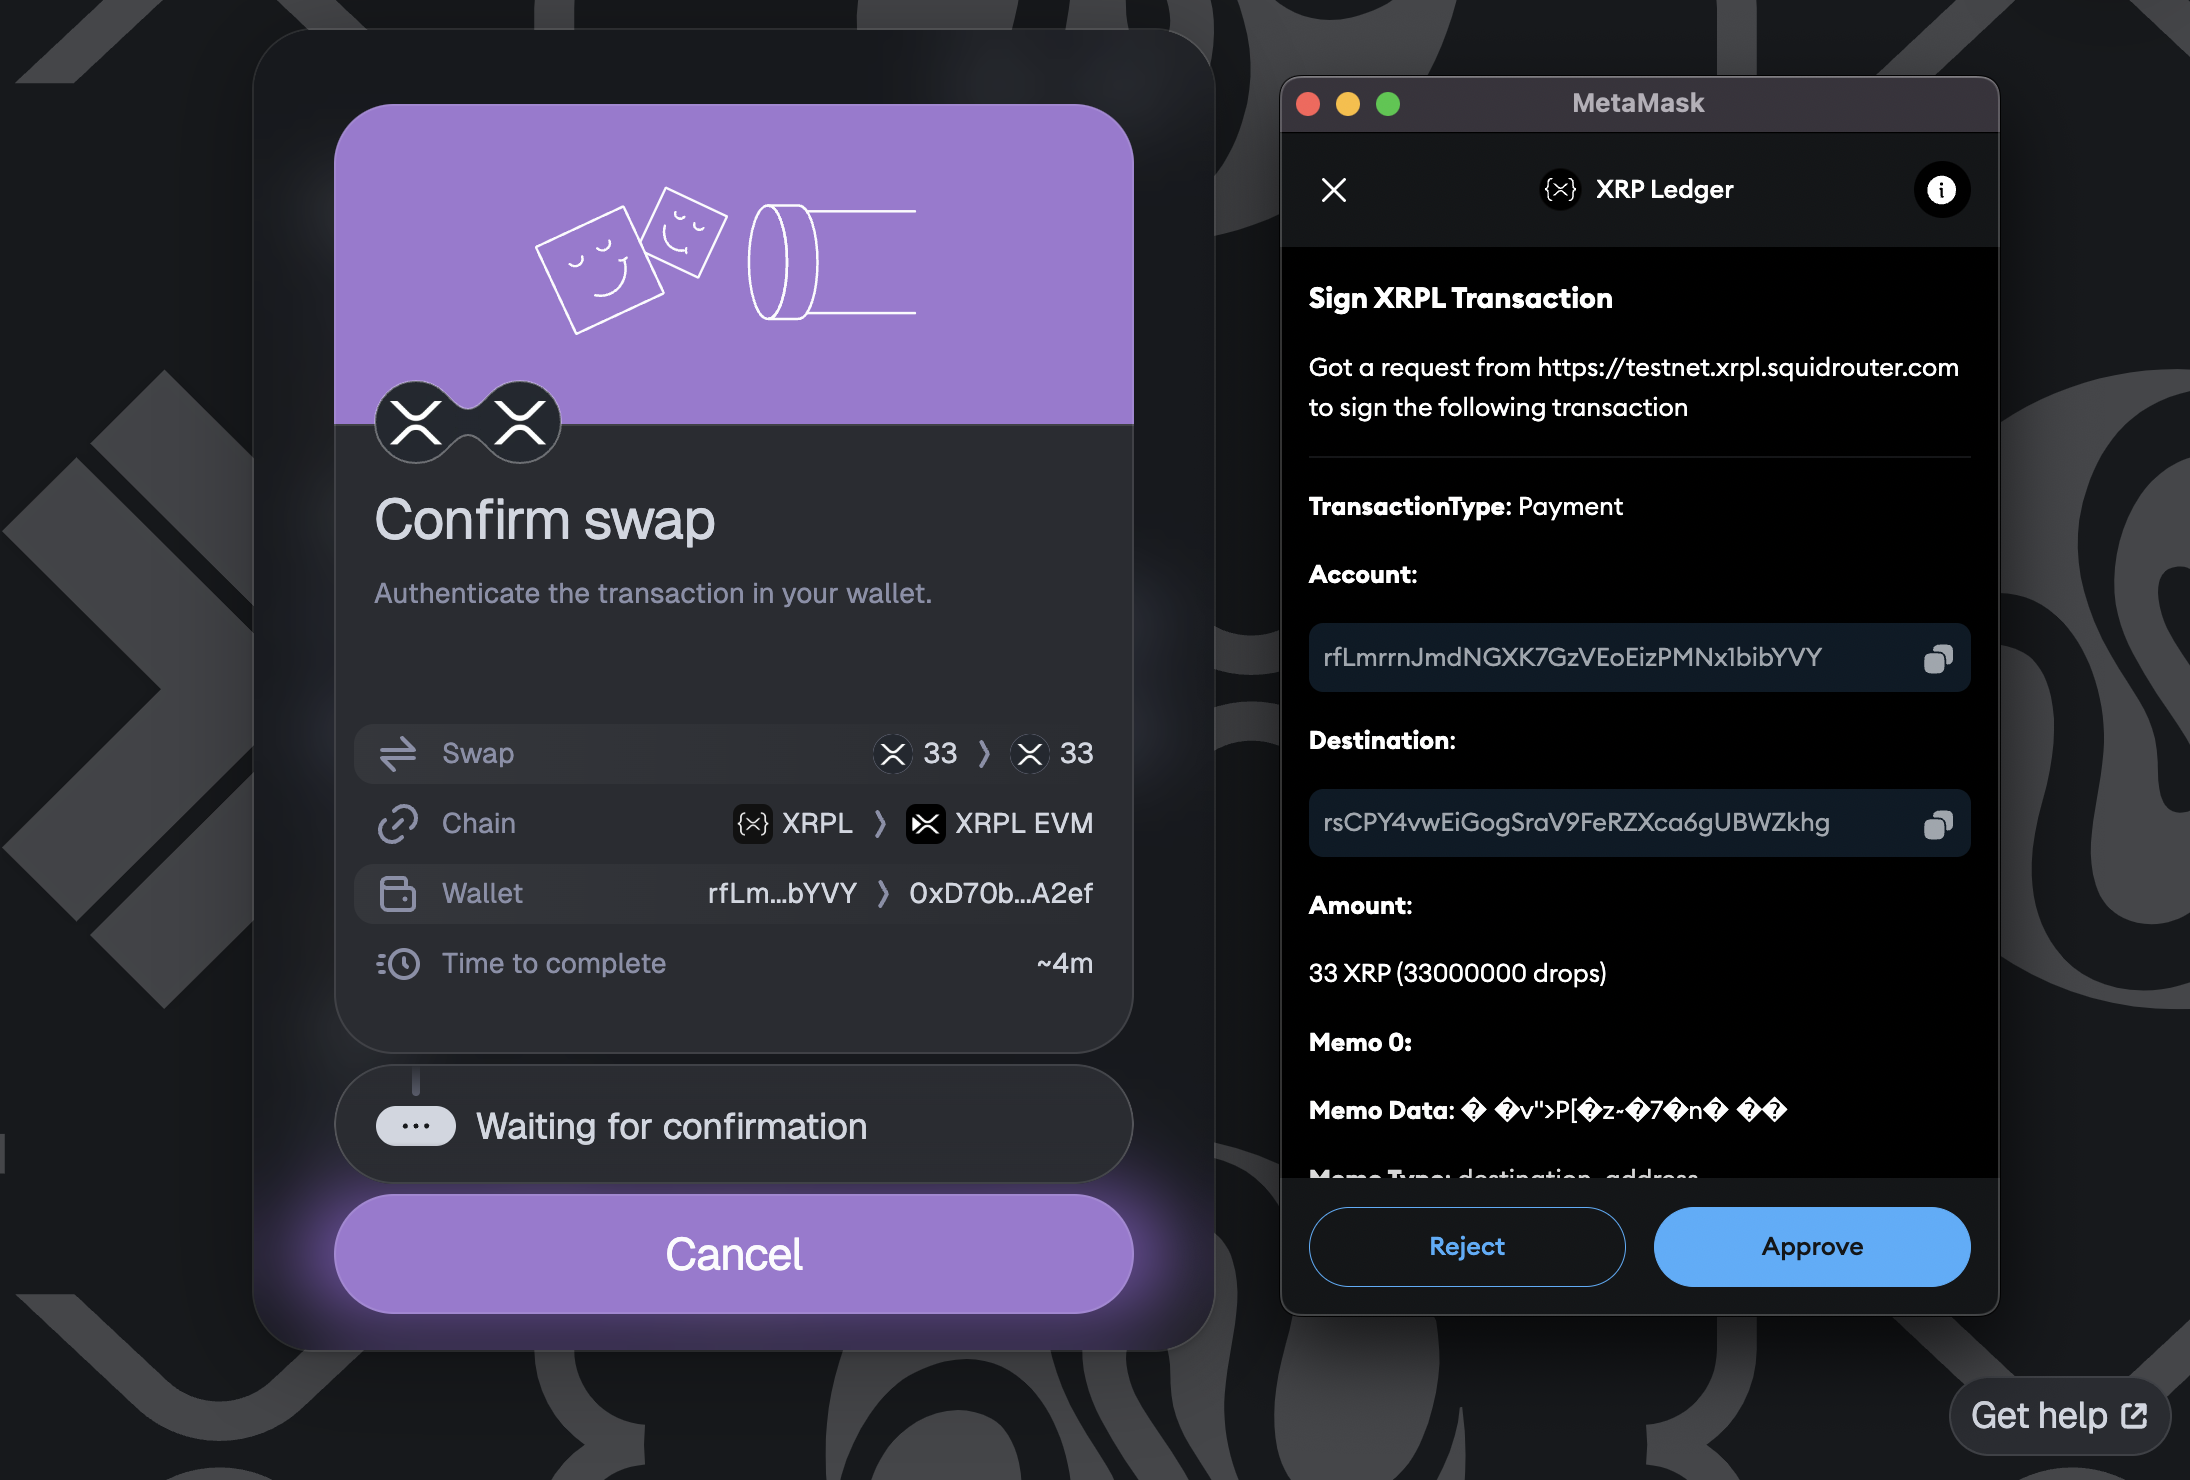
Initiate the Swap
- Click SWAP to begin the cross-chain transfer.
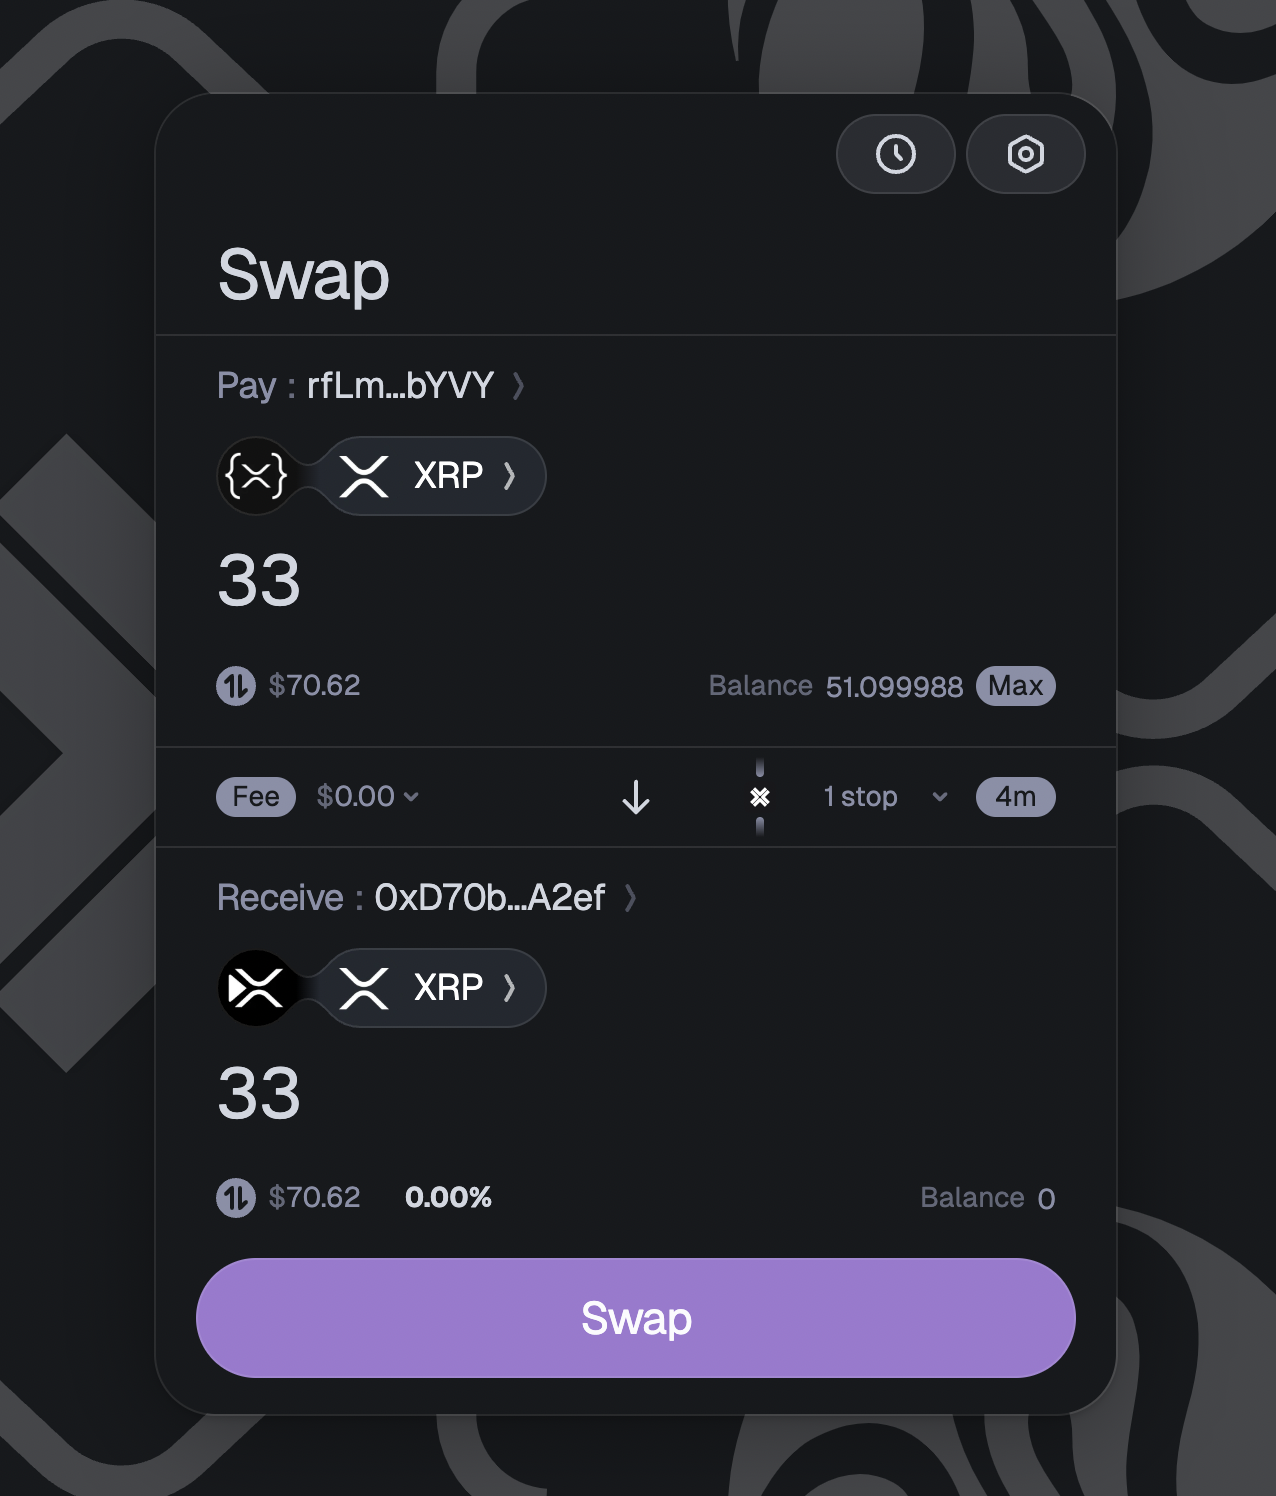
- Review and Approve the transaction in your XRPL wallet.
View Your Assets on the XRPL EVM
- Add the XRPL EVM network to MetaMask if you haven’t already.
- Once the transaction completes, your XRP (or other assets) will be visible in your XRPL EVM wallet.
By following these steps, you can securely swap assets across XRPL and XRPL EVM, and other Axelar-connected chains. Whether you’re a developer testing dApps or a user exploring cross-chain interoperability, the Axelar Bridge streamlines asset transfers and unlocks new possibilities across the XRPL ecosystem.